To start sewing, it’s best to begin with simple projects.
The goal is to get to know your sewing machine, master straight stitching, and, of course, have fun.
I’ve put together a small selection of projects to help you take your first steps into the world of sewing with quick, easy projects. If you look around a bit on the internet, you’ll see that most of these are pretty common suggestions.
The advantage here is that with Triple Kiwi, I’ll explain how to make each of them from scratch.
So, along with creating something new, you’ll also gain new skills.
The small drawstring pouch

This is one of the easiest projects out there. It’s perfectly suitable for children and makes a great family activity.
Eco-friendly, it’s handy for bulk shopping. Plus, depending on the pouch size, you can give a second life to fabric scraps.
It’s quick to make, and you can sew several in one session. An ideal project for your first steps in sewing and pattern-making.
You’ll need two fabric rectangles of the same size.
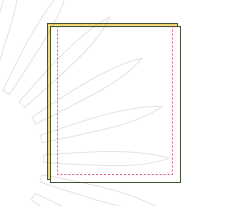
STEP 1 :
Place them right sides together and sew a U-shape (one side, the bottom, and the other side).
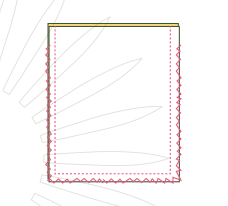
STEP 2 :
Use a zigzag stitch along the edges of the U, except for the top part, which will be folded into the hem.
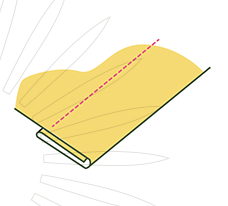
STEP 3 :
Make a hem by folding the fabric twice. It should be wide enough for the drawstring to pass through.
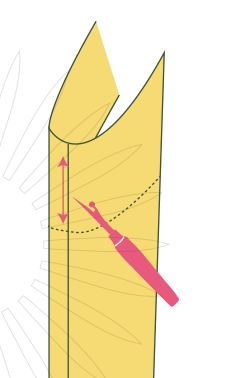
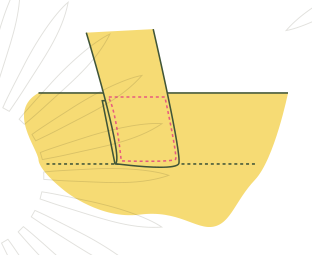
STEP 4 :
Undo the side seam between the top edge and the hemline.
STEP 5 : Using a safety pin, thread the drawstring through the small opening, around the pouch, and back out the same way.
For the drawstring ends, you can tie a knot, add a bead, or attach a special accessory.
The strappy tank top
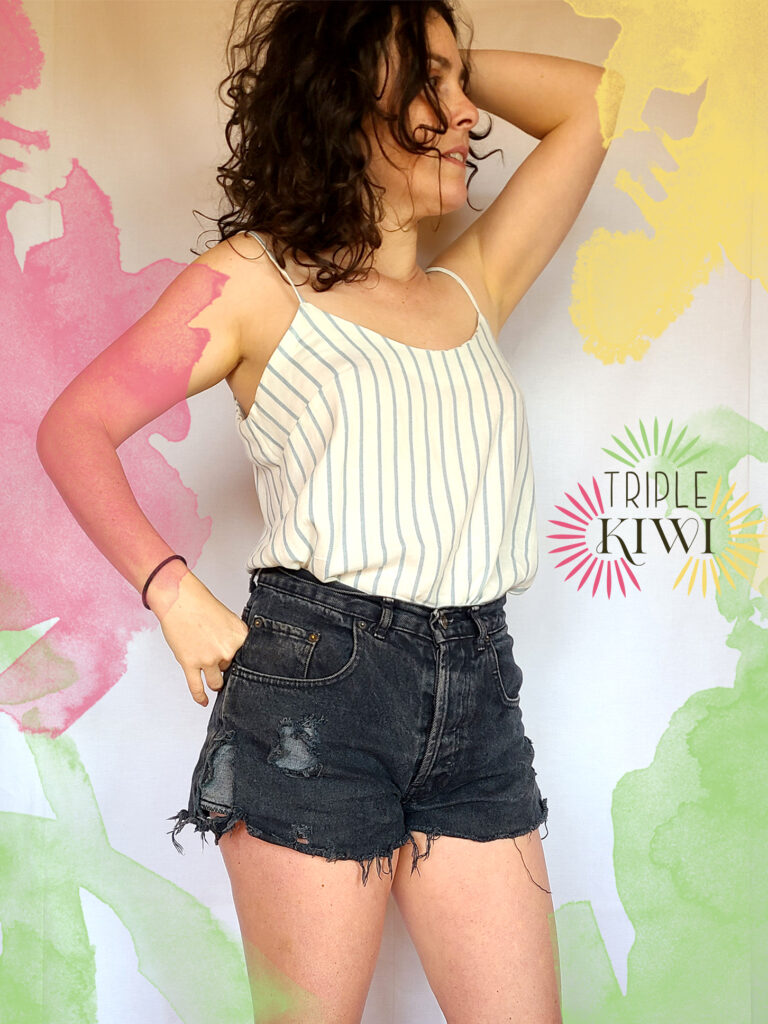
If you’d rather start with clothing, the strappy tank top is an excellent option.
Here, I won’t explain how to make the pattern because it’s a bit more complex than a simple rectangle. It has some shaping to ensure a nicer drape.
The Bleuet model is accessible to beginners. It’s comfortable and pairs well with all kinds of styles.
The illustrated instructions will guide you through this project in no time.
The most challenging part is sewing the darts. It’s always intimidating when you’re starting out, but you’ll see—it’s not as hard as it looks. Choose a lovely fabric and give this model a try!
Le tote bag
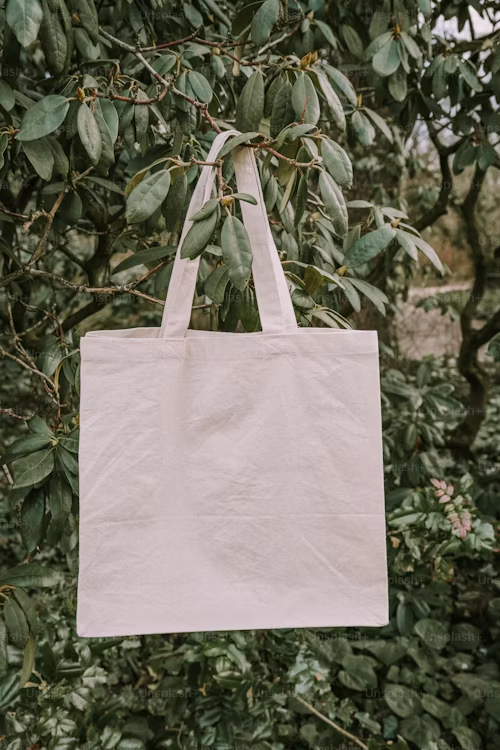
This is the number one project I recommend in my classes. Easy, quick, and creative, it’s a great way to learn pattern-making and sewing. In just one or two sessions, you’ll have a brand-new bag!
If you’re up for making it from scratch, I’ve created a video where I explain it step by step how to create the pattern according to the size you wish.
This way, you can choose the shape you like best. Small ones for kids, long ones for baguettes, classic shapes, and special ones for laptops.
If you’re making the bag without a lining, the sewing process is the same as 1, 2 and 3 of the pouch.
Next, we add the handles. These are two identical rectangles.
-To determine the length, place the bag on your hip at your preferred height. Use a measuring tape to find the length you need and add 5 cm in total.
-The width of the rectangle should be twice the desired handle width plus seam allowance.
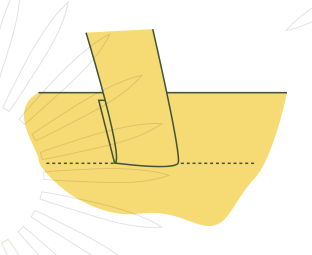
1. Fold the long strip lengthwise and sew along the edge. Using a safety pin, turn the tube right side out and press it flat.

2. Fold the ends and position them symmetrically on each side of the bag.
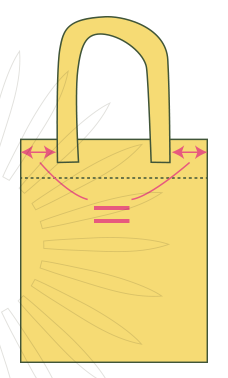
3. Sew a rectangular topstitch to secure the handles.
And there you have it ! A brand-new bag to carry all your stuff!
Fabric baskets

This is a super useful item for organization and incredibly easy to make. It can be used as a bread basket, a wipe holder in the bathroom, a pencil pot on your desk… you get the idea.
I spent a lot of time thinking about how to explain the pattern-making process and looked into how others do it. Then I found this site that you probably already know, which explains it so well that it seemed pointless to create an additional tutorial that wouldn’t add anything new to Huguette-Huguette’s. I highly recommend it!