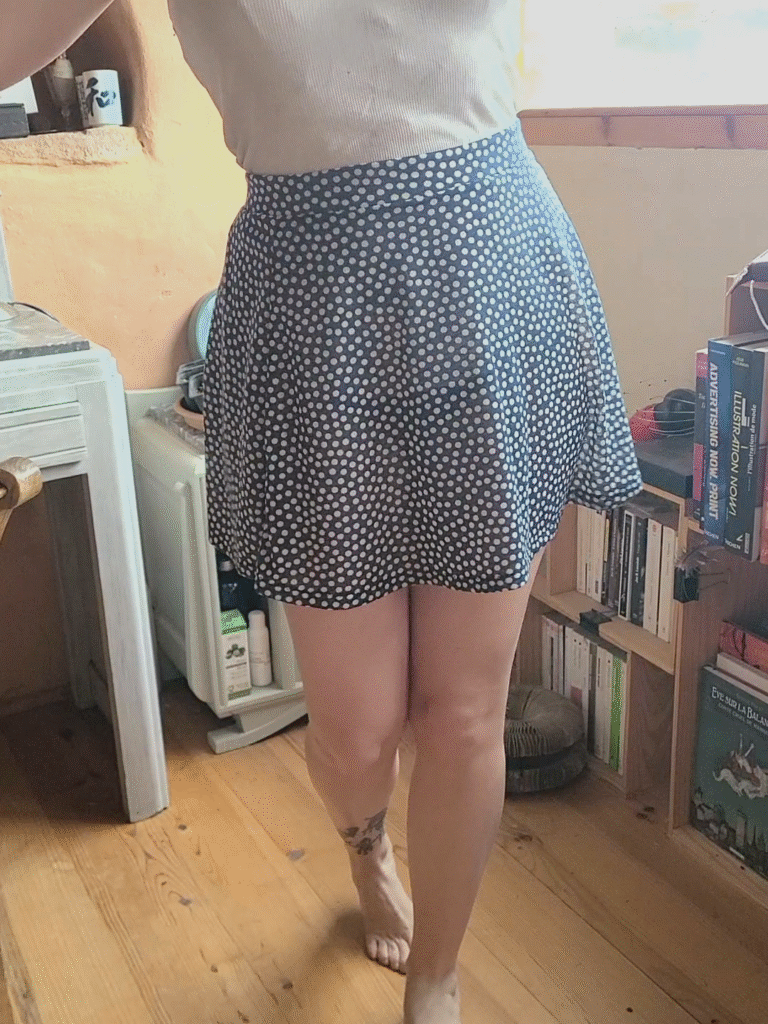
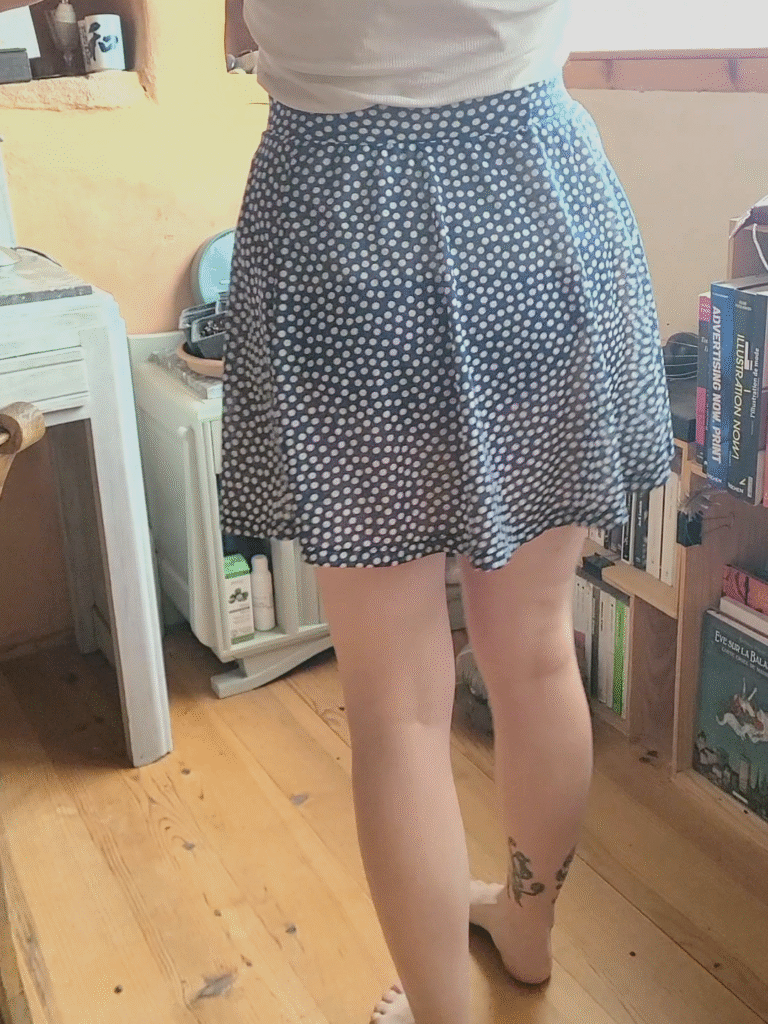
The circle skirt is a classic when you’re starting to sew. Depending on the fabric you use, you can create a more formal piece with velvet, silk… or something festive with sequins, or more summery and lightweight with cotton or linen…
In general, the pattern and construction are very simple and quick. Of course, you can make things more complex to vary the final look, but here I’m going to show you how to make the easiest version.
The necessary measurements
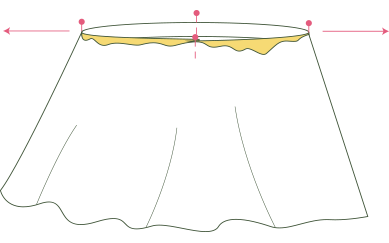
You only need your waist measurement and the desired skirt length!
Waist measurement: Take your measuring tape and measure around your waist that is the narrowest part. Adjust it without pulling too tight.
Skirt length: From the waist, measure how long you want the skirt to be. Short, medium, or long, it’s up to you!
The pattern and fabric yardage calculation
To help you, I’ve created a small file. You input two measurements and it automatically calculates the values for the pattern and the fabric and supplies needed.
You can draw the pattern on paper or directly on the fabric (if it behaves). For this, you’ll need your measuring tape and something to mark with (pencil, chalk, erasable pen…)
There are two scenarios:
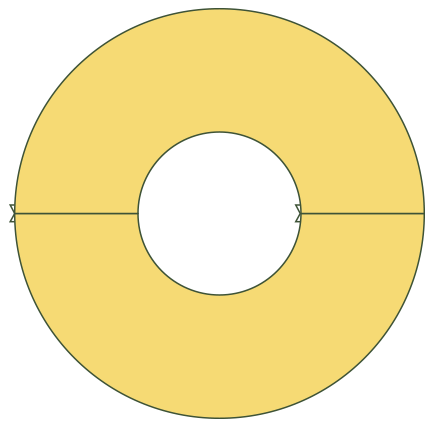
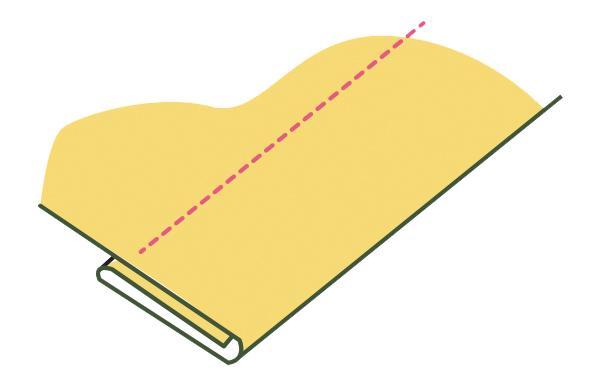
The entire skirt fits within the fabric width
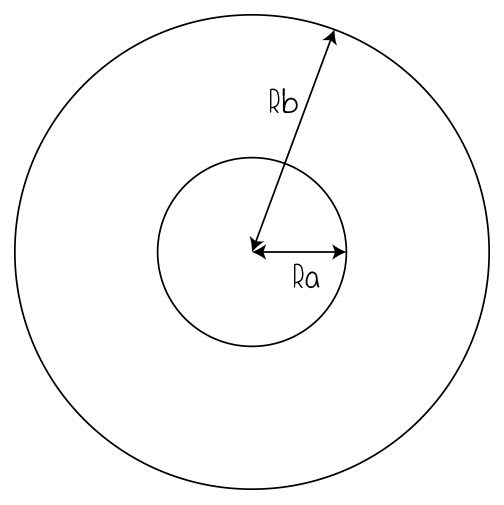
You can then make the skirt in one single piece.
Place the center point in the middle with a cross and draw the two circles gradually from the center out. That’s it!
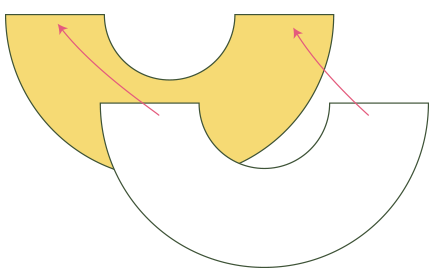
The entire skirt doesn’t fit within the fabric width
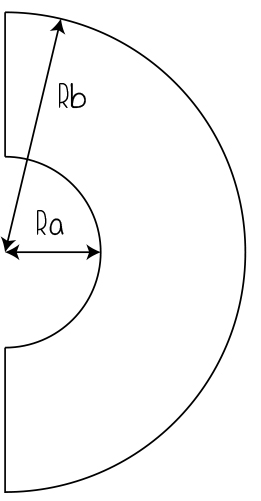
Then you draw a half-skirt and cut it on the fold. You’ll then have a skirt in two pieces (front and back) with two side seams.
Place the center point with a cross halfway along the fabric edge and draw the two half-circles gradually from the center out.
Preparing and cutting the fabric
I won’t write a whole chapter on this here, but as you know, you have to prepare your fabric. Look here, I explain why and how.
Then you can move on to cutting. Nothing easier here: just cut along the lines you traced earlier.
Sewing
If your skirt is in one piece, you can skip the first step and go straight to the second.
Step 1 Sew the side seams
For a clean finish, you can first zigzag the sides.
Then, right sides together, place the front on the back and sew with a 1 cm seam allowance.
Step 2 Attach the elastic to the skirt

First, sew the two ends of the elastic together with a zigzag stitch.
Next, use pins to mark four equal sections on the elastic. Do the same on the skirt.
Right sides together, match the marks.
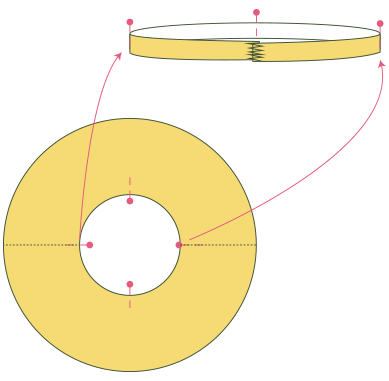
While stretching the elastic, sew with a 1 cm seam allowance.
For a clean finish, overlock this seam.
Step 3 Sew the hem
Fold the bottom of the skirt over twice to form the hem and sew.
And there you go! Feel free to ask me questions in the comments if you’re having any trouble!